Hello everyone, today I am posting what I hope will be the first of several tutorials I have planned to share on my blog. The main focus will be creating a craft that doesn't require you to go out and buy new products, instead I hope you will be able to use bits and pieces from your home stash. I encourage you to improvise where an item is not available and look at what you can recycle. They are easy enough to make that children can lend a helping hand. There's no sewing involved in this pixie, but if you don't have any glue you could hand sew if you prefer. I'm planting the seed, you go ahead and do it your way and most of all have some fun.
Two completed pixies and here is the template and written instructions. Scroll down to see how I went about the construction of the pixie. They look great hanging on a Christmas tree.
Once you download the template and written instructions, you will cut out the different parts of the pixie in whatever colours you want and then with glue or sewing needle and thread put it together.
I used a small piece of pipe cleaner to give some movement to the arms and glued it in place.
Make sure you add a piece of pipe cleaner for the neck as this will go into the foam ball and secure the head to the body.
Looks a bit messy, but my glue needs replacing, fresh glue is easier to work with. All this will be covered so it's not a concern at this stage.
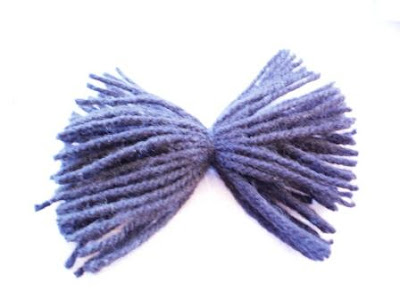
I sewed the beads onto the vest and hat. Then I made the hair from wool scraps, wrapping the wool around a piece of cardboard and then knotting the middle, like the part in the hair and I glued the hair to the foam ball.
The hair should look something like this when removed from the cardboard and the loop ends are cut. Spread out the hair to form a circle and if you like you could cut a bit of a fringe. Once all the bits and piece are assembled the end result looks like this. But remember you can make them quite different if you choose, it will depend on what material you have at hand and your own personal preferences.
You can paint a face on if you prefer. I kept it simple by glueing tiny felt eyes and nothing else. Because there is a pipe cleaner for the neck you can bend the head so it's looking downwards, giving the pixie a shy look and hence the face is not so prominent.
Hope you enjoy this tutorial and have fun making them.
I have a fun and easy gift to make for your pet next time.


Wonderful tutorial! Great way to use up all those bits and pieces of felt that I can't seem to throw away.
ReplyDeletethats wonderfull, i can make this the next week with my Grandchilderen,
ReplyDeleteI'm glad you like my little tut. Kids will have great fun with this.
ReplyDeleteHi Chris,
ReplyDeleteI know three little pixies in real life who will enjoy receiving these this Christmas. Thank you for sharing.